
Joining One Piece and Fighting Luffy: Behind the Scenes of an Animation Created in Three Weeks

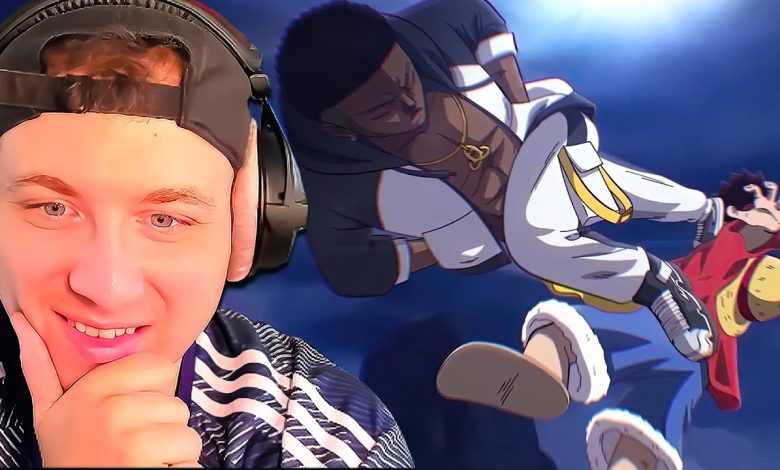
Imagining a brand-new character capable of appearing in the world of One Piece to challenge Luffy is already an ambitious undertaking. Building it from scratch with only three weeks of production time above all requires a method: focus on what matters, use the right tools, and accept that not every shot can be animated in the same way.
The result relies on a combination of drawing, 3D, frame-by-frame animation, visual references, compositing, and sound design. The aim is not to fully reproduce a studio’s processes, but to create a readable, dynamic fight scene that matches the energy of a battle anime.
Understanding One Piece’s Codes Before Creating
Starting with limited knowledge of the work first requires research. The characters, their development, their transformations, Devil Fruits, and Haki are essential reference points for grasping the series’ tone and the power that a confrontation with Luffy can convey.
This preparation is less about copying specific elements than about establishing a framework. In One Piece, a character must immediately stand out: through their silhouette, attitude, clothes, fighting style, or the way they occupy the screen. The world also brings together highly varied peoples and beings, as explained in our guide to One Piece races, peoples, tribes, and created beings.
The choice made for this original fighter is deliberately simple and recognizable: a tracksuit, Nike shoes, an athletic build, carefully defined outlines, and open confidence. This clothing contrast makes him instantly recognizable in a world as extravagant as Luffy’s.
From Character Design to 3D Modeling
Before the final drawings, generated images are used as sources of inspiration. They are not intended to appear as they are in the sequence; their purpose is to quickly provide ideas for the character’s design, posture, and overall look.
3D modeling then becomes a production tool. Rather than building every element entirely by hand, the method used combines models obtained from Sketchfab with modeling techniques. Referred to here as the “RAOUS” method, it means “Rapid and Optimized Speed with Sketchfab as a Lever.”
Its purpose is clear: optimize time, not the vertex count. In three hours, it makes it possible to obtain a usable model as a reference. The model does not need to be perfect, since the final result relies on drawing and composition; above all, it must provide a reliable foundation for angles, volumes, and movements.
Rigging, the Digital Character’s Skeleton
Once the model is assembled, rigging prepares it for animation. This step consists of placing a virtual skeleton inside the character’s body in order to control its joints. Arms, legs, torso, head, and other parts can then be manipulated without having to redraw or rebuild the model for every pose.
Rigging therefore turns a static form into a digital puppet. For a short project, it is especially valuable: it makes it possible to quickly obtain references for walking, turning, looking around, or head movements before redrawing them in the desired style.
Why 3D Speeds Up 2D Animation
3D does not necessarily replace traditional animation. In this production, it mainly acts as a guide. Some shots are drawn frame by frame, while others begin with 3D animation used as a base and are then reworked to achieve an appearance closer to Japanese animation.
The first shot, in which Luffy enters the frame and walks, is thus built from a 3D reference. Creating a model of the hero would have been a waste of time under such a tight deadline. A freely obtained 3D character animation therefore serves as the foundation before being redrawn.
This solution still requires work: more than sixteen hours are needed to complete that shot despite the references. However, 3D provides a solid structure, particularly for volume, perspective, and the rhythm of movement. A basic 3D animation can be created in twenty to thirty minutes, whereas a complete manual animation would require much more time.
The same principle applies to several movements: Luffy regaining his senses, a fighting stance, a head movement, or a character turning before delivering a line. The rule is pragmatic: what matters is what appears within the frame. Elements that remain off-camera do not need to be detailed.
Animated References: Saving Time Without Losing Clarity
The fight also includes shots inspired by movements that already exist in anime. The confrontation notably involves a strike delivered to Luffy so quickly that he has no time to react. The gesture evokes very direct fight staging: a swift impact, a relaxed stance, and an attack that favors efficiency over showmanship.
Using references makes it possible to study editing, the weight of a movement, and the placement of key poses. It is also a realistic way to meet a three-week deadline. Without them, several shots would have required an amount of time incompatible with the project.
This logic is especially relevant to action sequences. In a series such as One Piece, the impression of power does not depend only on how a character is drawn: it depends on timing, camera work, freeze frames, sonic impact, and the contrast between poses. To place these mechanics in the wider context of battle shōnen, see also the main anime power systems.
Compositing: The Step That Unifies the Shots
Once the animations are complete, compositing gives the whole sequence a more consistent and impactful appearance. It is the step that corrects differences between characters and backgrounds, enhances effects, and turns isolated elements into a coherent sequence.
The adjustments include color changes to better integrate characters into the backgrounds, as well as camera movements when they strengthen the natural feel or impact of a shot. Speed lines, glow, and other visual effects emphasize the speed and violence of the action.
A preset filter, added grain, and chromatic aberration whose intensity varies from shot to shot complete the image. These details do not replace good animation, but they can amplify an acceleration, an appearance, or an important strike.
Voice Acting and Sound Design Give the Duel a Voice
A fight scene only works fully when it has a sonic identity. The sound design is created from sounds extracted from the anime, then reworked with Audacity and Premiere in order to integrate them into the sequence.
Voice acting also plays a central role. Luffy’s voice is performed by a professional voice actor able to imitate the character’s French version. The original character also receives his own lines, notably when he introduces himself as Raoul and challenges Luffy to face the confrontation.
The contrast between the newcomer’s confidence and Luffy’s reaction establishes the entire promise of the scene: an unknown figure appears, unsettles the hero through his presence alone, then turns this nighttime encounter into a duel. To further explore the work’s major figures and mysteries, read about the members of the D. Clan in One Piece.
FAQ
Why use 3D for an anime-style animation?
3D makes it possible to quickly create references for poses, walking, rotations, and perspective. Here, it serves as a working foundation before drawing, rather than as a systematic final render.
What is rigging?
Rigging consists of adding a structure comparable to a virtual skeleton to a 3D model. This structure makes it possible to move and articulate the character for animation.
How can an animated sequence be completed in three weeks?
Time is saved by combining several methods: assembled 3D models, rigging, reference animations, redrawn shots, reused movements as working foundations, and compositing to harmonize the whole sequence.
