

Warning: this article discusses major events from the Thriller Bark arc in One Piece.
At Thriller Bark, the Straw Hats have just defeated Gecko Moria. Yet their victory does not mean the danger is over. The crew is exhausted, Luffy is on the verge of collapse, and the people whose shadows Moria stole could still disappear in the sunlight.
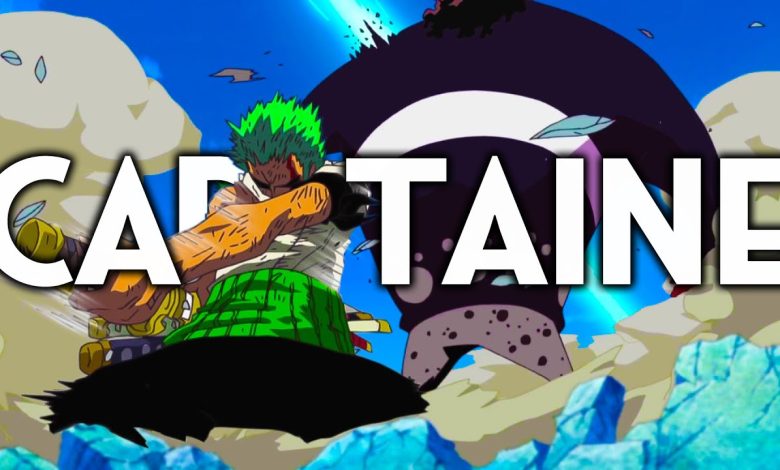
It is in this context that Roronoa Zoro asserts himself in a way that goes beyond his swords. He does not officially replace Luffy as captain, but he takes responsibility for the group when Luffy can no longer act. Facing Bartholomew Kuma, Zoro becomes the shield that steps forward while the others are forced back.
After Moria, a victory that nearly turns into tragedy
Gecko Moria’s fall should free the shadows he absorbed. However, they take time to return to their owners. Without their shadows, Zoro, Sanji, and Robin are exposed to the sun and risk being destroyed. The crew helplessly watches an absurd situation unfold: the battle has been won, yet several of its members are still dying.
When the shadows finally return to their original bodies, the tension eases. The residents of Thriller Bark, freed from Moria’s control, want to thank the pirates with food, treasure, and money.
In Luffy’s absence, Zoro answers on behalf of the crew: the Straw Hats want nothing. They did not fight to earn a reward or to be celebrated. This calm, decisive intervention already foreshadows his role as second-in-command: he knows how to speak for the group when the situation demands it.
Kuma’s arrival: a threat sent to silence Thriller Bark
The brief calm is immediately shattered by Bartholomew Kuma’s appearance. The Warlord is ordered to eliminate the island’s inhabitants, who witnessed Gecko Moria’s defeat, along with the Straw Hats. For the World Government, seeing the same crew defeat Crocodile and then Moria is a problem that must not be allowed to spread.
The pirates have already endured an exhausting battle. They now find themselves facing another Warlord, known as the Tyrant, whose abilities remain largely unknown. Anxiety immediately spreads through the group.
Zoro, however, steps forward. He is injured, out of breath, and visibly weakened. But when Kuma addresses him directly as the “Pirate Hunter,” the swordsman understands that a confrontation is unavoidable. Kuma also appears to identify Zoro as the first obstacle to remove before reaching the rest of the crew.
Zoro’s message is crystal clear: to touch his captain, Kuma will have to go through him first.
Why Zoro acts like a first mate
This scene is not merely a duel. Zoro makes decisions concerning everyone’s survival. He orders the others to fall back and chooses to face Kuma alone, knowing that he is probably not strong enough to defeat him in his current condition.
He has no illusions about his chances. His choice follows another logic: if he gives up, who will protect Luffy and the others? His determination does not come from certainty that he can win, but from his refusal to abandon his role as their protector.
This position reflects what defines Zoro throughout the adventure: his loyalty to Luffy and his ambition to become the world’s greatest swordsman are never separate. His personal dream only has meaning if he can defend the captain to whom he gave his word.
To better understand the stakes surrounding Kuma’s power and pirates’ supernatural abilities, see our guide to the main anime power systems explained, which also covers Devil Fruits.
Zoro’s desperate battle against Kuma
Kuma gradually reveals how dangerous his Devil Fruit power is. His palms can repel whatever they touch. They allow him to deflect attacks, propel air at terrifying speed, and move almost instantaneously.
Zoro launches an initial assault with two swords, but Kuma dodges it with ease. The Warlord then counters with force powerful enough to leave craters in the ground. Zoro narrowly avoids a strike that would very likely have killed him at close range, before being hit by a long-range attack capable of tearing through Thriller Bark’s debris.
Despite his injuries, he uses 36 Pound Phoenix. Kuma repels the attack effortlessly. Zoro then understands the fundamental nature of the danger: his techniques can be sent back by his opponent’s palms.
Franky also tries to stand against Kuma, but a violent air blast puts him out of action. The fact that Zoro withstood a comparable attack highlights his exceptional endurance, without changing the reality of the power gap: Kuma overwhelmingly dominates the fight.
When Zoro finally adopts his three-sword style, he manages to evade several attacks with Bull Demon Slash. He even lands a hit on Kuma, but his blades are not enough to turn the battle around. The Warlord’s body proves abnormally durable, as Sanji also discovers when he injures his leg against Kuma’s face after a surprise attack.
Zoro’s final strike and the impossible ultimatum
Luffy remains unconscious. Franky, Sanji, and Zoro are no longer able to continue the battle normally. Kuma then gathers an enormous mass of compressed air and gives the crew an ultimatum: hand over Luffy’s head or suffer the explosion.
The Straw Hats unanimously refuse to betray their captain. Kuma unleashes the attack, and its explosion devastates Thriller Bark. Amid the ruins, he heads toward Luffy to complete his mission.
That is when Zoro rises once again. Using Shishi Sonson, Lion Song, he manages to wound Kuma. The gesture is crucial: even at the absolute limit of his strength, Zoro remains the only one standing between Kuma and Luffy.
He cannot continue, however. His body no longer responds, while Kuma retains the upper hand. Zoro then abandons the physical battle for a negotiation that sums up his loyalty: Kuma wants a head, so he will take Zoro’s instead of Luffy’s.
The sacrifice: Zoro sets aside his dream for Luffy
Kuma asks Zoro whether he is truly willing to give up his ambition to save Luffy. Despite his condition, Sanji wants to take his place and sacrifice himself as well. Zoro refuses. He knocks out his rival and takes that responsibility alone.
The most symbolic gesture comes when he places his swords on the ground. For a man whose entire path is tied to the sword, it means he is prepared to lose everything. He does not give in out of weakness: on the contrary, he states that he could never fulfill his dream if he were unable to protect his captain.
Kuma then extracts all the pain and fatigue Luffy accumulated during his battles and gathers them into an immense bubble. Zoro first receives a glimpse of that suffering: a small amount is enough to make him collapse. Yet he gets back up and voluntarily enters the entire bubble.
He accepts living through hell in Luffy’s place.
This loyalty also sheds light on Luffy’s central role in the story of One Piece. His name, family, and the legacy he carries are among the series’ greatest mysteries, as explored in our article on the members of the D. Clan in One Piece.
“Nothing happened,” a line that became legendary
When the crew members regain consciousness, Luffy is in perfect condition: Kuma has removed his exhaustion and injuries. Worried, Sanji looks for Zoro and finds him standing with his arms crossed, covered in blood.
When asked what happened, Zoro simply replies: “Nothing happened.”
The line became legendary because it encapsulates his sacrifice. Zoro seeks neither recognition nor gratitude. He does not talk about what he endured, claims no special status, and never challenges Luffy’s authority. Yet at Thriller Bark, he held the position of a leader: he spoke for the crew, faced an insurmountable threat, and chose to bear pain that was not his own.
His act does not make him the Straw Hats’ captain. Rather, it shows why he is an irreplaceable right-hand man: when Luffy falls, Zoro is willing to risk everything so his captain can rise again.
The moments when Zoro takes another step forward remain essential to his journey, especially when he appears to use Conqueror’s Haki more consciously. On that subject, discover Mihawk’s Conqueror’s Haki and Zoro’s conscious awakening.
FAQ: Zoro’s sacrifice at Thriller Bark
Did Zoro really take Luffy’s place?
No, Zoro does not officially become captain. However, with Luffy unconscious and the crew unable to fight, Zoro temporarily takes on the responsibilities needed to protect the group.
Why does Kuma accept Zoro’s offer?
Kuma agrees to let Zoro take the pain and fatigue extracted from Luffy’s body in his place. Zoro’s act affects him deeply, to the point that Kuma concludes that Dragon’s son is very well surrounded.
What does “Nothing happened” mean?
This line conceals Zoro’s sacrifice. After absorbing Luffy’s pain, he refuses to make it a matter of glory or recognition in front of his companions.
